Step-by-Step Guide to Installing BlueStacks Android Emulator on Windows Server VPS/VDS via RDP
Watch a detailed Hindi guide on installing and setting up BlueStacks Android Emulator on local machines and VPS/VDS servers.
How to Install BlueStacks Emulator on VPS/VDS RDP: A Step-by-Step Guide for Windows Server.
Introduction
Installing the BlueStacks emulator on a VPS (Virtual Private Server) or VDS (Virtual Dedicated Server) via RDP (Remote Desktop Protocol) may seem like a challenging task, but it offers tremendous benefits for those who want to run Android apps and games on a virtual environment. BlueStacks, one of the most popular Android emulators, is primarily designed to run on personal desktops and laptops. However, by following the right procedure, you can easily set up and use the BlueStacks emulator on a Windows Server through RDP.
The BlueStacks emulator allows you to run a wide range of Android applications on your computer, bypassing the need for a physical Android device. Whether you want to play Android games on a larger screen, test mobile applications, or use Android apps for productivity, BlueStacks provides an efficient way to bring mobile software to your PC. With BlueStacks installed on your VPS/VDS, you can run Android apps remotely, enabling you to access them from anywhere with an internet connection, as long as your VPS remains online.
While BlueStacks is optimized for desktops, using it on a VPS or VDS can still provide substantial benefits, especially when you have a powerful server with sufficient CPU, RAM, and storage resources. Running the BlueStacks emulator on a VPS/VDS environment is particularly advantageous for developers who need to test Android apps remotely or users who want to enjoy Android games without having to rely on their mobile device’s limited performance. Additionally, scaling the resources on a VPS/VDS can help provide a more consistent experience, especially for resource-heavy applications or games that require more computing power.
However, installing and running BlueStacks on a VPS/VDS isn’t without its challenges. These servers often lack the necessary hardware acceleration found in physical desktops, which could affect the performance of BlueStacks and Android apps. But by ensuring that your VPS meets the minimum requirements for BlueStacks, you can overcome these challenges and run lighter Android apps and games effectively. This detailed guide will walk you through the necessary steps to successfully install the BlueStacks emulator on your Windows Server via RDP, along with performance tips to help optimize the experience for a smooth and seamless operation.
By the end of this guide, you’ll have all the information you need to run Android apps on your VPS/VDS and enjoy the full functionality of the BlueStacks emulator on a Windows Server setup, whether for gaming, development, or app testing.
Step-by-Step Guide to Installing BlueStacks Android Emulator on Windows Server VPS/VDS via RDP
February 7, 2025
How to Install BlueStacks Emulator on VPS/VDS RDP: A Step-by-Step Guide for Windows Server
Today in this blog we will learn how to install Android Emulator ( BlueStacks ) on Windows RDP or VPS in just a single Click.
Before we start installing Android Emulator (Bluestacks )we have to make sure of some of the basic things. First, make sure your RDP or VPS provider supports Virtualization most cloud providers do not support virtualization on their RDP or VPS but I want to mention some of them. 1. Digital Ocean 2. Vultra 3. Linode
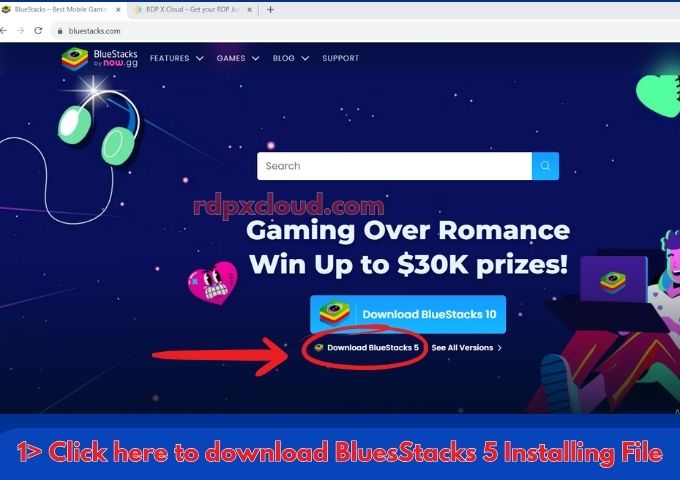
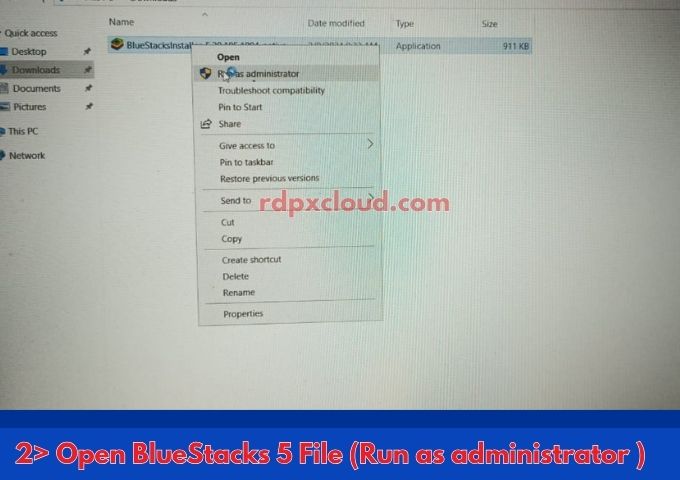
Step no 2: After downloading the Bluestacks 5, click on the downloaded file and Run as Administrator
Step no 3: Now the installing screen is open in front of your eyes click on the install now button
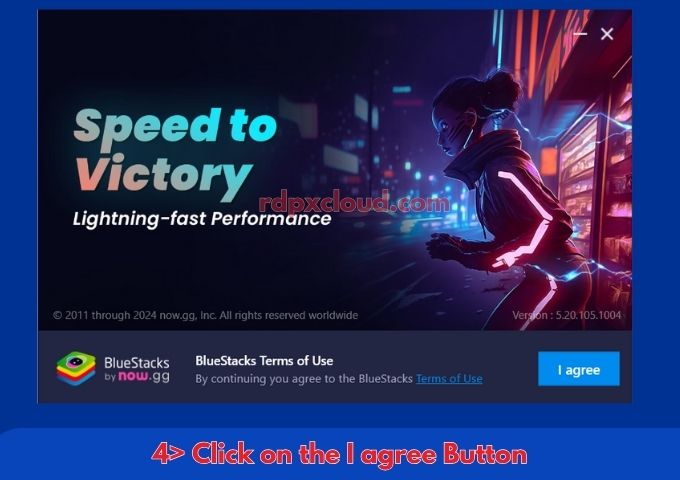
Step no 4: Here are the terms and conditions agree button click on I agree
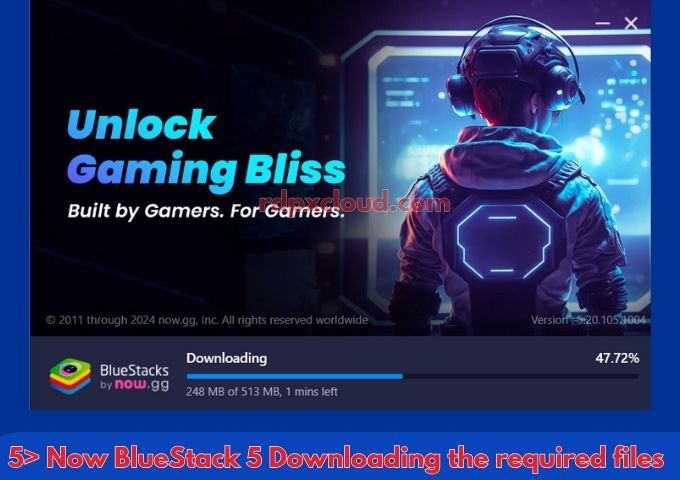
Step no 5: Now Bluestacks 5 trying to download some files
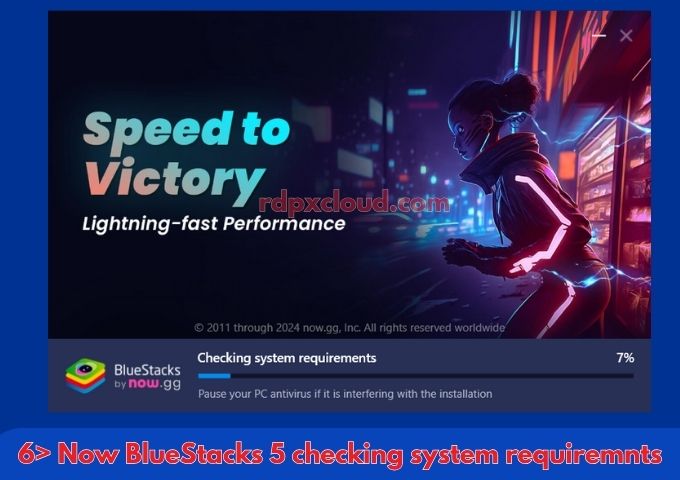
Step no 6: After downloading completed Bluestacks 5 check the requirements of RDP or VPS.
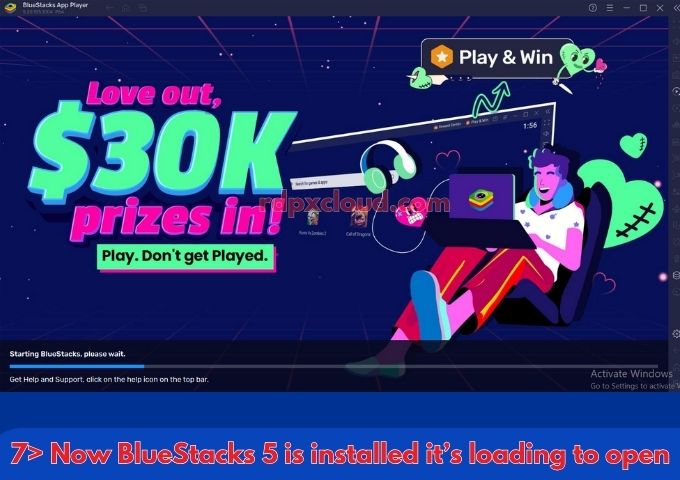
Step no 7: After checking the requirements of the RDP or VPS system now Bluestacks 5 is loading to start.
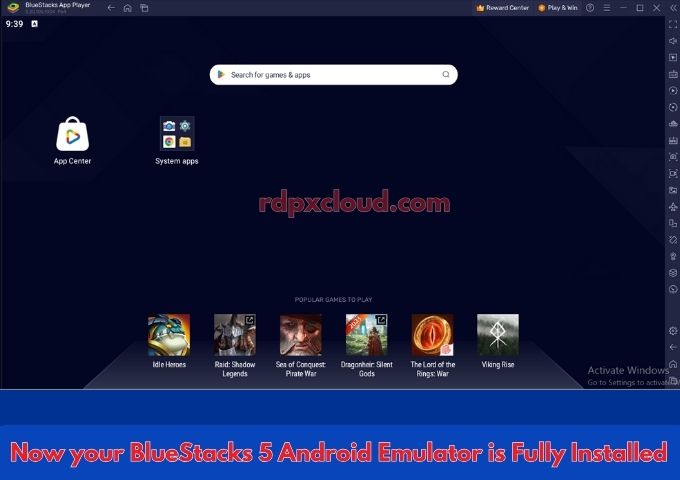
Step no 8: Your Bluestacks 5 is successfully installed on your RDP or VPS.
Note: Before start using the emulator ( Bluestacks ) please restart your RDP or VPS. Do this for only the first time when you installed Bluestacks. It is recommended for the best performance.
If you have any questions about RDP or VPS please do not hesitate to ask and if you want any type of RDP or VPS services contact us 24/7 on WhatsApp or check our YouTube channel ( RDP School ) or website.